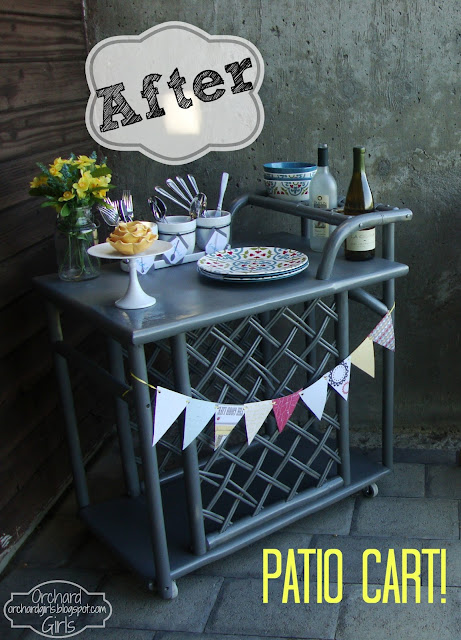
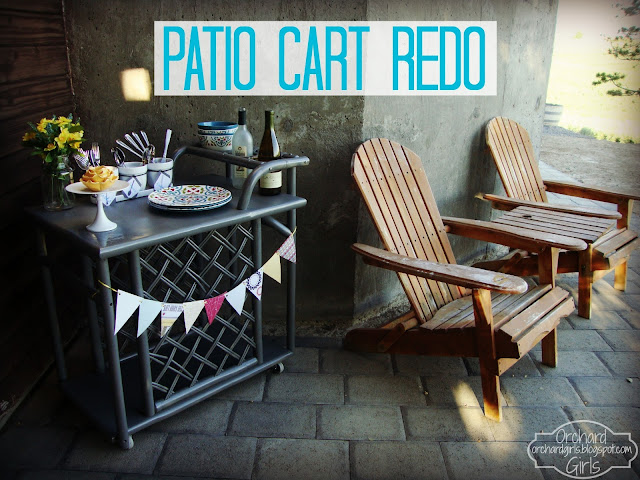
First things first, I got this cool patio cart from my Dad, for FREE! Yes, free! No complaints about that. If you haven't seen my previous post with my "Patio Mood Board" go check that out. On my board I posted a picture of this patio cart...
So, when my Dad said, "hey I've got a cart for you" (for free) You can imagine how excited I was! Here is the one that he gave me...
So much potential! It was an off-white creamish color (that's a legit color, right?) and was pretty beat up, and a missing wheel, but definitely fixable things.
I wanted to paint it gray and add some stenciling on top of the cart.
Painted Gray...check! Steciling on top...FAIL!
After SEVERAL different methods and failing again and again, I gave up on the stenciling. Do you have a tutorial on how to stencil, please post in the comments! I obviously need some assistance. Lol. Anyway, I think it turned out pretty good.....considering!
Put some new wheels on that bad boy, and spray painted it gray.
(Paint and Primer in One Granite spray paint from Home Depot)
I think it turned out okay. What do you think? Think I should add some stenciling on top, or just leave it as is? Thank you for stopping by our blog and following along, we really appreciate all your support.
Be sure to come back on Thursday for PART 2! Where I will talk about all the details of how, and what I used to decorate our Patio Cart - Including some FREE printables for you guys :)
Have a wonderful day,
 Be sure to check out the parties we link to HERE!


Hi, and wow you did a great job redoing this cart. I saw it on tues. trivia.
ReplyDeleteJulie from julieslifestyle.blogspot.com
Julie, thank you so much! So nice of you to stop by and say hi :)
ReplyDelete-Kayla
Adding a stencil-type effect would look awesome! I particularly love the colors yellow and grey together. Have you considered making a cutt out and "stamping" the pattern, rather than stenciling it? Just a suggestion. I have seen "easy" tutarials on pinterest on how to make your own stamp. Most were very simple and consisted of a wood block and a foam sheet (purchased for cheap from a local craft store). The foam was cut in desired pattern, glued to wood, and viola. All done! I have also seen an easy stamping technique by cutting a potatoe in half and carving a design in that way. ~Krista
ReplyDeleteAHHH! Krista, those are such good ideas. I will have to look into that. You make it sound so easy, lol! :)
ReplyDeleteOh my gosh that turned out super cute! I'm terrible at stenciling too...it always bleeds. The stamping idea that Krista suggested sounds like I great idea though!
ReplyDeleteJulie, thank you! I think I will end up trying the stenciling again, sometime soon. I'll keep you all posted! Hopefully it works out this time. Lol.
ReplyDelete-Kayla
I absolutely LOVE this beverage cart, gorgeous redo ladies :) Thank you for linking up to Inspiration Monday !
ReplyDeletexo, Tanya
http://twelveoeight.blogspot.com/2013/07/inspiration-monday-party-were-inspired.html
It turned out so cute!!! Stenciling is touch and go for me! Following you back!
ReplyDeleteThank you ladies! Tanya, your party is always a blast!
ReplyDeleteMindi, thank you for the sweet comment and for following along, we love new readers!! :)
-Kayla
So gorgeous!! Love all its detail! Jenna @ Rain on a Tin Roof
ReplyDeleteGlad I'm not the only one with stencil fails. They can be tricky. Your cart makeover looks awesome!
ReplyDeleteThank you, Jenna... be sure to come back Thursday to see Part 2 - Where i'll show you what all I used to decorate this piece :)
ReplyDelete-Kayla
Audra, stenciling is a definite challenge! I think I found a method to try, we'll see. Thank you for your sweet comment! :)
ReplyDelete-Kayla
Love, love, love it! Thanks for linking it up at Monday Funday!
ReplyDeleteThank you for sharing on Tuesday Trivia. What a cute makeover. I love it! Pinned it.
ReplyDeleteWanda Ann @ Memories by the Mile
Katie, thank you for the sweet comment. It's always a pleasure linking up!
ReplyDeleteWanda, thank you for the encouragement!! Have a wonderful day ladies.
-Kayla
I love the cart. I would of never been brave enough to try grey but you made it work. New Follower!
ReplyDeleteThank you so much! Yeah, Dnaiel and I are pretty big grey fans (seeing as every room in our house is a shade of gray) Lol. It did take several layers, pretty tedious! Thanks for following along! :)
ReplyDelete-Kayla
I love this piece, and that you stuck with simple. maybe it was meant to be that the stencils be a fail?!
ReplyDeleteLol. Maybe you're right! Thank you for stopping by and the nice comment :)
ReplyDelete-Kayla
What an awesome cart--love the color!
ReplyDeleteThank you, Katie! I know, I'm pretty obsessed with grey! Lol.
ReplyDelete-Kayla
I love this cart. What an incredible job you did~so creative!
ReplyDeleteTeri, thank you so much for stopping by and the nice comment! :)
ReplyDelete-Kayla
Super cute! For the stencil, did you use a foam blotter-type thing? Or did you use a brush? Foam blotters are wayyy better than brushes, and if you make sure that you have *just* the right amount of paint on it (not too dry, not too soaked), then the stencil will turn out great. But it takes a bit of practice. 'Course, this is coming from someone who can never get paint tape to do its job....
ReplyDelete