Banner

Orchard Girls

Sunday, December 9, 2018

Keto Low Carb Chocolate Peanut Butter Cups


Chocolate Peanut Butter Cups by Orchard Girls Blog
Guys, these are SO GOOD! These really have a great taste and remind me so much of the original Reese's peanut butter cups. When you first start the KETO diet I think its best to stay away from treats, keto or not, all together. Once I got adapted to Keto eating I slowly started introducing baked "keto treats". And let me tell you...there are so many delicious recipes out there that you can make/adapt and find what works for you. Recipe for these delicious Chocolate Peanut butter cups down below..
Chocolate Peanut Butter Cups by Orchard Girls Blog
For these chocolate peanut butter cups I used a silicone mini cupcake mold for these, and I feel like they were the perfect size!  
Keto | Low Carb Chocolate Peanut Butter Cups by Orchard Girls Blog

Chocolate Peanut Butter Cups by Orchard Girls Blog

Chocolate Peanut Butter Cups by Orchard Girls Blog
These would be a great keto treat to bring to a Christmas party to share (or not share, haha) That way you're not tempted so much by all of the non-keto treats laying around. I've found this works for most occasions and keeps me from snacking on the cheat treats!
Chocolate Peanut Butter Cups by Orchard Girls Blog
Recipe adapteed from wholseomeyumblog 
(who has many more amazing recipes, so be sure to check her out!)

Ingredients:
Chocolate Layers:
  • 10 oz Sugar-free dark chocolate(divided; ) I used dark chocolate Lily's Chocolate Chips
  • 5 tbsp Coconut oil (divided)
  • 1/2 tsp Vanilla extract 

Peanut Butter Layer:
  • 3 1/2 tbsp Peanut butter (creamy) I used Reese's Creamy peanut butter (surprisingly low carb)
  • 2 tsp Coconut oil
  • 4 tsp Powdered monk fruit sweetner (to taste)
  • 1 1/2 tsp Almond Flour (or peanut flour if you have it!)
  • 1/8 tsp Vanilla extract 
  • 1 pinch Sea salt (optional, to taste)

Directions:
  1. Line a muffin tin with parchment paper or use a silicone muffin/mini muffin tin
  2. For the bottom chocolate layer, heat half of the chocolate (5 oz) and half of the coconut oil (2 1/2 tbsp) in the microwave in 20 sec intervals until melted. Stir in half of the vanilla (1/4 tsp).
  3. Fill the bottom of the parchment cups evenly with chocolate (about 2 tsp  in each). Freeze for 10 minutes, until at least the top is firm.
  4. Meanwhile, for the peanut butter layer, heat the peanut butter and coconut oil in a microwave (same method as step 2). Stir in the powdered sweetener, almond flour or peanut flour, vanilla, and sea salt (if using), until smooth. Adjust sweetener and salt to taste if desired.
  5. Spoon a teaspoon of the peanut butter mixture onto the center of each cup over the chocolate layer. It will spread a little into a circle, but not quite reach the edges, which is what you want. Freeze for another 10 minutes, until at least the top is firm.
  6. Meanwhile, make the top chocolate layer. Heat the remaining chocolate (5 oz) and remaining coconut oil (2 1/2 tbsp) in a microwave (same method as step 2). Stir in the remaining vanilla (1/4 tsp)
  7. Pour the chocolate into the cups, over the peanut butter layer (about 2 tsp in each). The chocolate will fill the empty space on the sides of the peanut butter circles and also cover the top.
  8. Return to the freezer for at least 20-30 minutes, until completely firm. Store in the refrigerator.
Recipe adapted from Wholesomeyum blog so be sure to check out WHOLESOMEYUM BLOG for more nutritional information, details, tips, and tricks on this recipe!!

Thanks for stopping by, and I hope you enjoy!!!
-Kayla

Monday, October 15, 2018

Low Carb Keto Everything Bagels

Keto Bagels by Orchard Girls Blog
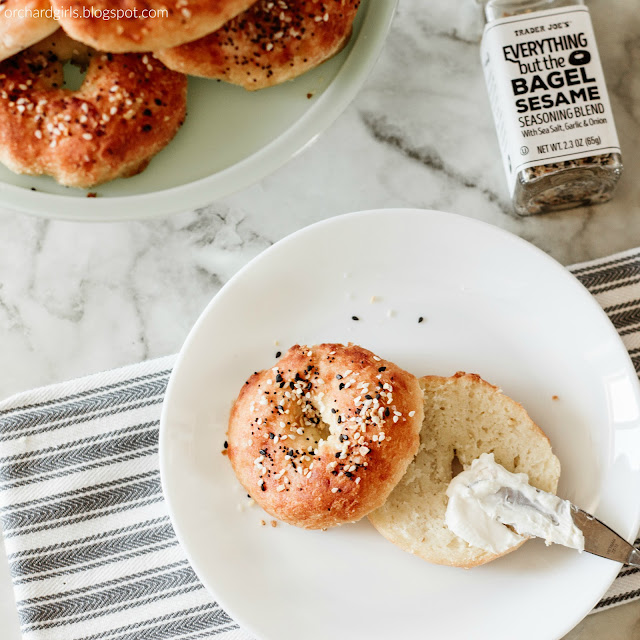
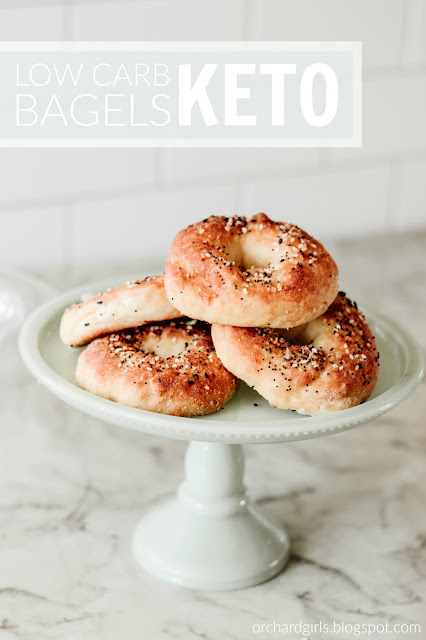
If you're eating low carb, chances are at some point, you'll be craving some bread! This recipe for keto friendly everything bagels will definitely hit the spot. This is a slight spin on the traditional fathead dough recipe with some added tips and tricks to ensure your bagels turn out JUST RIGHT!
Low Carb Keto Everything bagels by Orchard Girls Blog
Look at that great texture! Something I love about these bagels is how bread-like the texture is. When eating them, I don't think you could guess the ingredients. The texture is great and the taste is even better.
Low Carb Keto Everything bagels by Orchard Girls Blog

Low Carb Keto Everything bagels by Orchard Girls Blog

Low Carb Keto Everything bagels by Orchard Girls Blog
 RECIPE:
Low Carb Keto Everything bagels by Orchard Girls Blog
*Tips*
-When making these you can divide them up into as many bagels as you'd like (more bagels means less net carbs per serving!) If you make a batch of 7 - the net carbs per bagel is 4.5
-The Everything seasoning is at Trader Joes but I have recently seen a larger and less expensive version sold at Costco!
-Using a silicone baking sheet is super helpful at making sure your bagels evenly cook and don't get too browned on the bottoms. *Plus these silicone mats are awesome for all types of baking!*
-Make sure you let the bagel tops turn completely golden brown on tops before you take them out of the oven to ensure they do not deflate/flatten once you take them out.
Low Carb Keto Everything bagels by Orchard Girls Blog
These bagels are perfect for SO many meals, from breakfast to dinner, they're so versatile. 
Examples:
BREAKFAST:
Everything Bagel with cream cheese, bacon, and avocado
LUNCH:
Pizza everything bagel (load the bagel with you favorite low carb marinara sauce and pizza toppings.
Dinner:
Pork Roast sandwiches on your everything bagel

These may be 4.5 carbs a piece but if you load them with zero carb/low carb toppings they're extremely filling, making for an overall low-carb meal!

ENJOY! :)

-Kayla

Friday, October 12, 2018

Memory Collage Blanket Review + GIVEAWAY!

     I don't know about you, but I love to give and receive a good quality photo gift. With the holidays coming up, especially Christmas, this is the perfect timing for this review and giveaway!
(Disclosure: I received a complimentary blanket for this review. However, know that all opinions, are my own and based on my personal experience)

     Let's jump right in! First thing I want to say is that this photo collage blanket by collage.com is absolutely beautiful, so soft, and loved by everyone in the family.  The blanket was created with great color reproduction and the photos are crisp and clear, something I was a little worried about. However, it turned out great and I am thoroughly impressed. The quality truly exceeded my expectations.
     When you first visit collage.com they make the experience easy and fun! You can upload any pictures you would like and test them out on various collages and templates. They have so many different projects to choose from. I am so happy with the sherpa blanket, that we went with. It was fun experimenting with the different pictures, and honestly, the hardest part of the process was narrowing down which pictures to use. With the creative freedom that collage.com offers, the sky is truly the limit! They have projects such as blankets, canvases, photo books, and so much more. When you are choosing your layout you can choose to have the whole blanket be one picture or a layout with a lot of pictures. You can also add words or a quote to the blanket too, which is so fun for gifts!
     Once you have your layout just the way you'd like it, you can securely checkout and pick your shipping method. We received our blanket fairly quickly as well, which is so important around the holidays (ensuring you get your packages on time). Our blanket came wrapped up to help prevent any damages from the shipping process. Once we received our blanket it quickly became one of my families favorites. It ends up being moved from room to room and someone is always snuggled up in it. It really is SO soft! I love that BOTH sides of this blanket are equally soft, the size is perfect too. We went with the 50''x60''.
 I mean just look at our little man all snuggled up and fast asleep (pretty sure he approves :)

    We would love for one of you to receive a photo blanket too, which is why we've teamed up with Collage.com to have a giveway! One lucky winner will receive their very own collage blanket! To enter the giveaway head to my instagram @kaylawriter or CLICK HERE!

Thanks for stopping by! If you won, what type of blanket collage would you make?
-Kayla

Wednesday, September 5, 2018

Cinnamon Glazed Donuts (Keto)

orchardgirls.blogspot.com

I am currently obsessed with these cinnamon glazed donuts (Keto style). Fall is right around the corner and those donuts from the pumpkin patch are going to be all too enticing and having an alternative is just what I needed. I adapted this recipe from (Caroline's Keto Kitchen).
orchardgirls.blogspot.com

Here's what you'll need: (donuts)
2 eggs
½ cup almond flour
¼ cup or 1 packet of Quest cinnamon crunch protein powder (any keto friendly protein powder should work)
2 tbsp coconut flour
¼ cup erithyrtol, granulated (sweetner)
¼ tsp salt
2 oz cream cheese, softened
2 tsp baking powder
1 tsp vanilla
1/4 cup heavy whipping cream
1/4 cup water

Glaze (from Caroline's Keto Kitchen):
1/4 cup butter
1/4 cup erithrytol (sweetner)
1/2 cup heavy whipping cream
1 tsp vanilla

Instructions:
1) Pre-heat the oven to 350 degrees. 

2) Separate 2 eggs. Set aside the egg yolks. Whip the egg whites to stiff peaks with a hand mixer and set aside.

3) In a large mixing bowl, mix together the dry ingredients (almond flour, cinnamon crunch protein powder, coconut flour, erithrytol, salt, softened cream cheese and baking powder).

4) Add wet ingredients (egg yolks, vanilla and whipping cream/water). Stir until mixed very well. 

5) Gently combine stiff egg whites with the mixture. Stir gently until mixture is all one color.

6) Spray a muffin tin and fill 1/3 of the way up OR Spray two donut pans with coconut spray and fill each mold about 2/3 of the way.

7) Bake in the oven for 12-15 minutes or until lightly browned. (Longer for a muffin tin) Let donuts cool in pan for 5 minutes, and then take them out of their molds and set on a paper towel. If you used a muffin tin use a rounded piece to cut out holes.

8) Melt butter in a frying pan and then add the erithrytol. Once the sweetner is fully melted, add the heavy whipping cream and vanilla, and stir over heat for roughly 5 minutes. 

9) Remove glaze from heat. If you want a thicker glaze, wait at least 45 minutes to apply glaze. If you prefer a thinner glaze, dip each donut once in the frying pan, applying glaze to both sides. If you like donuts very sweet, you can dip each donut twice. If you are not a fan of sweet donuts, you can spoon glaze over donuts rather than dipping them in.

Enjoy your delicious donuts!!!
orchardgirls.blogspot.com

I hope you enjoy these low carb / keto friendly glazed cinnamon donuts! I sure know I'll be making another batch soon!
-Kayla
Instagram @kaylawriter


Monday, August 20, 2018

Keto (Low Carb) Cheesecake Recipe


www.orchardgirls.blogspot.com

I've recently joined the Keto Diet club! Although its been quite an adjustment, it has definitely been worth it. I am two weeks in and have lost 12lbs already! I find myself eating WAY less food, yet I am completely satisfied and don't feel at all like I'm starving myself. However, I definitely have a sweet tooth and wanted to find something low-carb to satisfy it. I went searching for a Keto friendly cheesecake recipe and actually found quite a few but none that worked with what I had and what I wanted to use. So I mixed three different recipes and came up with this one.
www.orchardgirls.blogspot.com

This cheesecake turned out as a dense (almost tart like) rich cheesecake that definitely satisfied my sweet-tooth!

*To be sure you track how much each slice is double check with all the specific ingredients you end up using* 
Mine ended up being about 3-4 carbs per slice - plus maybe 1 more for the added strawberries.
www.orchardgirls.blogspot.com

I hope you enjoy! I am still perfecting this recipe and if I make any changes will update the recipe on this post! ENJOY!
-Kayla

Friday, January 26, 2018

FREE: Modern Farmhouse Bible Verse Printables


I was looking for some new prints to hang up in our house, and decided to just create my own. I came up with a set of three matching bible verse graphics. Today, I've decided to share them with you all, for FREE!! Keep reading to see them, and how to download your FREE prints!
www.orchardgirls.blogspot.com


The bibles verses included in this set are:
1. Colossians 3:2 (CLICK TO DOWNLOAD)
     Set your mind on things above
2. Colossians 3:12 (CLICK TO DOWNLOAD)
     Clothe yourselves with compassion.
3. Jeremiah 31:3 (CLICK TO DOWNLOAD)
     I have loved you with an everlasting love. 
www.orchardgirls.blogspot.com

Once you click the links above, just download the image to your computer and then upload it to your favorite printing service! These images are perfect for 8''x10'' prints (or smaller). Enjoy!

xo,
Kayla

Wednesday, January 24, 2018

Slow Cooker Crispy Pork Tacos

Tacos...need I say more? Delicious crispy pork tacos were on the menu for last night! I had a boneless pork roast, and knew pulled pork tacos are always a hit. I find cooking almost anything in the crock pot to be easier and less work on my end. This recipe is no exception! Keep reading for the recipes of these delicious crispy pork tacos! I adapted this recipe from the lovely blog GimmeSomeOven !

www.orchardgirls.blogspot.com


INGREDIENTS:

  • 1 (4-5 pound) lean boneless pork roast, cut into 3 inch pieces
  • 1 cup chicken stock
  • 1 medium white onion, diced OR onion powder 
  • 4 cloves garlic, peeled and minced
  • 1 tablespoon chipotle powder (or 1 chipotle in adobo sauce, minced)
  • 2 teaspoons cumin
  • 1 teaspoon black pepper
  • 1 teaspoon chili powder
  • 1 1/2 teaspoons salt
DIRECTIONS:
  1. Add all ingredients to a large slow cooker, and combine. Cook on low for 6-8 hours or on high for 4-5 hours until the pork is completely tender and shreds easily with a fork.
  2. Once the pork is cooked, preheat your broiler to high heat and prepare two baking sheets with aluminum foil. Use a fork to shred the meat into bite-sized pieces, and then use a slotted spoon to transfer it to the prepared baking sheets, spreading the pork in an even layer and leaving the juices behind in the slow cooker.  (Don’t discard the juices, we’re going to use them later!)
  3. Place one sheet under the broiler for about 5 minutes, or until the edges of the pork begin browning and crisping up. Remove the sheet from the oven, then ladle a scoop of the of the juices from the slow cooker evenly over the pork, and then give it a good toss with some tongs.  Broil for an additional 5 minutes to get the meat more crispy. Then remove and ladle an additional scoop of broth over the crispy pork. 
  4. Repeat with the other baking sheet of pork.
  5. NOW to assemble! I assembled these by spreading sour cream on a small tortilla and wrapping in around a cripsy ranch flavored taco. Topping it with cheese, lettuce, chopped onion, and fresh cilantro! YUM!!
I hope you enjoy! :)

-Kayla

Pinterest

Related Posts Plugin for WordPress, Blogger...