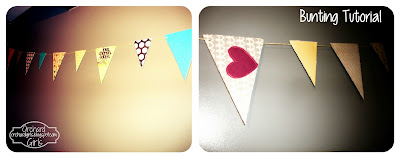
“Bunting” seems to be really popular right now, and why not?
It’s super cute! When I had found out that I was having a girl, I couldn’t wait
to go out and pick cute patterns for a DIY bunting project. It was really easy
too!
Items Needed:
-Scissors
-Cardboard
-Various scrapbooking papers
-Paper Glue
-Single hole puncher
-String or Ribbon
First thing I did was go to our local Craft Warehouse, there
I found, already cut bunting triangles. It would be just as easy to cut out
your own from cardboard (cheaper too!).
Anyway,
whichever you decide the next step is the fun part! Pick out various coordinating
patterns of scrapbook paper. I think that step took the longest! So many
to choose from…
Take
the scrapbook paper, and using the cardboard triangle as a template, draw round
the triangles and cut them out. Next
you’ll need to match up the scrapbook paper with the cardboard and apply it
using paper glue. After
that you’ll need the hole puncher. Punch two holes on the small side of the
triangle, one on each end. Now you’re ready to feed your string/ribbon through the triangles, making it as long as needed.
The picture below is actually a bunting project that my friend Alexis did for Addie's baby shower. She did a similar method, however she did it without cardboard backing and ribbon instead of string. Works just as well, and still super cute!
Thanks for reading, I hope you found this tutorial helpful. There are so many different/fun ways of creating bunting! Please feel free to share any ideas or tips you might have tried. --More Nursery projects coming soon!--
There is our little Addie girl at 2 months old. Today she will already be 5 months old! She is growing up so fast. I can't believe she has almost been here for 1/2 a year. Funny thing is, we haven't even moved her to her actual room yet. So she hasn't been able to enjoy all her fun decorations. I think we will start transitioning her into her crib at 6 months. I'll keep you updated on that.
I hope you're having a wonderful Monday,


so cool ... love this girls
ReplyDeleteThank You! We're glad you enjoyed it. :)
ReplyDelete