As you can see, we don't have too much of a front yard. We started with an old sidewalk put in several years ago. A big dirt patch where the previous renters had a hot tub. And not much of a patio at all. Here are our plans for just the yard - - use a rototiller over the whole yard, put in a large paver patio, and put down all new sod/grass, and purchase patio furniture. We also plan on painting our front doors and our house. Here is what we've completed so far...
1. Rototil Yard
2.Large Paver Patio
2.
3. Lay down sod/grass
4. Patio Furniture
5. Paint Front Doors
6. Paint House
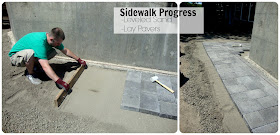
The first thing we had to do was rototil the yard and put down sand where the patio was going to be laid.
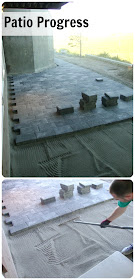
While we were waiting to get started this was a our make shift sidewalk. Before this, it was trips back and forth to the the car in my rain boots carrying a car seat with one arm and a different pair of shoes in the other. It was quite the site. Anyway, once we purchased all of the pavers and the sand was laid out we got started!
When laying a paver patio a couple things to remember:
(Okay, i'm obviously not an expert and this is our first project like
this so these are just some of the things we did - keep in mind we're not professionals! :))
1. Rototil down to fresh ground
2. Pack down the surface - each layer (dirt, gravel, sand)
3. Before laying pavers use a level to make sure the ground is level.
**tip: use pipes along the edges as a guide to flatten the surface**
4. Lay out your pavers and pound down with mallet.
5. Lay down edging pieces to ensure your pavers do not shift over time
6. Pour special sand over entire patio that settles into the cracks and hardens.
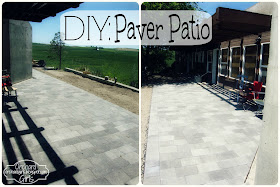
Okay, and here is the part where I admit that after we laid the entire patio down, we had to REDO it, because we didn't take the time to level it completely. OYE! Here is our COMPLETED patio! YAY!
I'm really excited to get the rest of the yard done! Next we need to get the new grass down. Then get our patio furniture and have a BBQ! I'll keep you guys updated on our progress, as we go!
Real quick here is a BEFORE/PROGRESS SHOT side by side!
Have a great day,
This post is linked up to these lovely linky parties HERE!


that is faaab, and I am super jealous! we need a patio of some kind out back...I hate having our table and chairs in the grass. it just feels too buggy! this looks great.
ReplyDeleteThis looks great! I can't wait to see the end result! Thank you for linking with HickoryTrail
ReplyDeleteThank you so much ladies! It has been working out great so far, I really love it and can't wait to get some furniture out there so we can enjoy it even more!
ReplyDeleteWow! Looks great! xoxo
ReplyDeleteThank you so much! :)
ReplyDeleteIt is looking great!! Thanks for partying with us at Give Me The Goods Monday! Hope to see you back next week! Jenna @ Rain on a Tin Roof
ReplyDeleteThank you, Jenna! We enjoy partying with you ladies.
ReplyDelete-Kayla